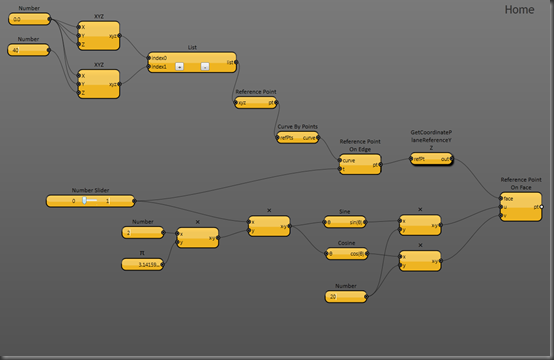
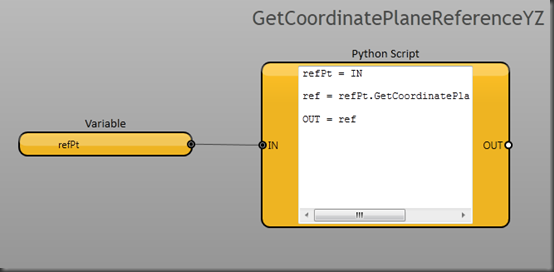
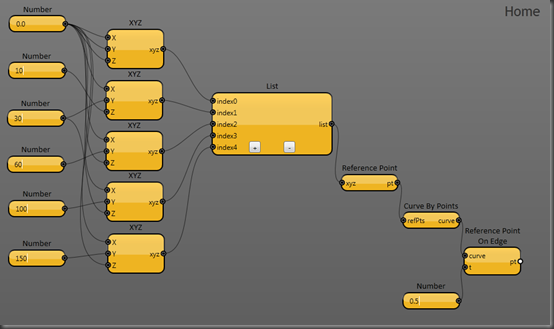
This is a description of how my Dynamo-powered Punkinator works. I’ll start with an overall, top-down description, and then move on to a bottom-up explanation of each of the nodes.
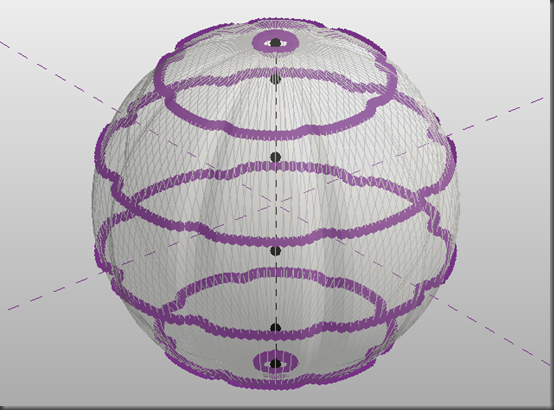
The pumpkin is a loft form generated from a set of profiles. Each profile is a loop of model lines drawn on a horizontal plane, and the loops get smaller towards the top and bottom of the form to produce the generally spherical shape. You can see the purple reference points used to create the loops in this screenshot of a pumpkin in X-Ray View (you can’t see the model lines because the refpoints are so closely spaced):
The reference points are calculated using Johan Gielis’ superformula of an ellipse, equation (2) in his 2003 paper:

This looks a bit intimidating, but the aim of it is to calculate a radius (r) from an angle, phi (Φ). Then use the radius and angle as polar coordinates to plot a point. If you plot a series of points using different input angles, you can join the dots to create a loop.
Why use the superformula? Well the sample plots in Gielis’ paper suggested that it could create some nice organic shapes, given the right input parameters a, b, m, n1, n2 and n3. And there are several images online that show pumpkin-like superformula shapes.
So I figured that if I could generate a series of pumpkin-shaped loops using the superformula, I could loft a form through them and create a pumpkin for Zach Kron’s 4th Annual Parametric Pumpkin Carving. And it worked!
Now on to the more detailed explanation, starting at the bottom:
Superformula
This is the fundamental node. It calculates the radius from a given angle, based on the superformula with input parameters a, b, m, n1, n2 and n3.
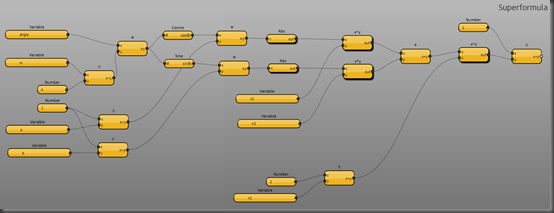
It is a fairly straightforward implementation of the superformula. The angle, m, a, and b inputs are at the left; the n1, n2 and n3 inputs are in the middle. The rest is just the mathematical manipulation.
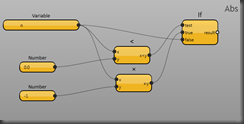
The Superformula node makes use of a couple of helper nodes: Abs, which calculates the absolute value of the input:
and x^y which calculates x to the power y using a snippet of Python:

This is the only bit of Python in the solution. I guess you could make a recursive pure-Dynamo node that would calculate a power. But at the time, the Python implementation was more direct.
Incidentally, this also shows one way of pushing multiple inputs into a Python node: The List node packages the two input values into one list; and then the Python code unpacks the list elements into individual variables.
I put the Transaction node in because while I was testing, Dynamo complained that it needed one. I don’t really see why it should need one at this point, so I may try taking it out again now.
Superformula XYZ
This creates a Revit API XYZ element using the distance and angle from the superformula node:
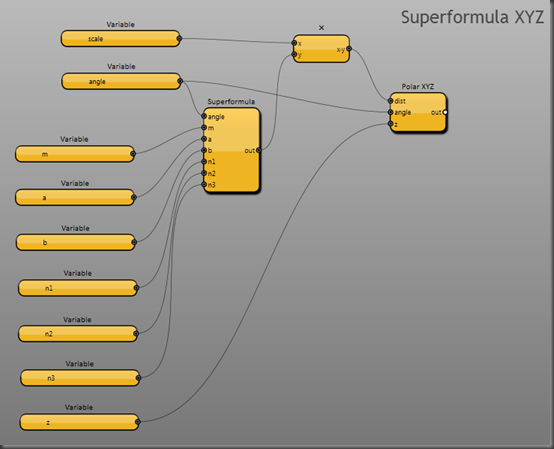
It also has a scale input, to scale the loop up and down, and a z input, to move the loop to different z values.
Superformula XYZ uses just one helper node, Polar XYZ:
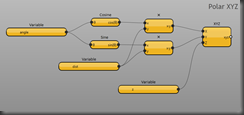
This uses a bit of trigonometry to calculate the X and Y values from the input polar coordinate, and then calls the standard XYZ node.
Why do I keep creating these helper nodes? Three reasons:
- You can test and debug the helper node in isolation
- It makes the main node simpler to understand
- You can re-use the helper nodes in other solutions
Superformula Loop
This creates a loop of reference points from the superformula, and then connects them with lines:
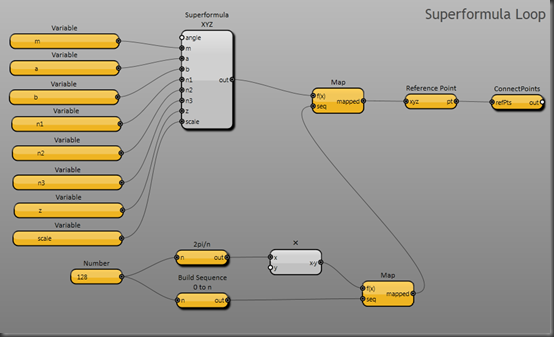
The nodes at the bottom of the layout divide a full circle into a sequence of angles. The Number node on the left is where you set the number of divisions (i.e. the number of points in the loop). Higher numbers create smoother loops, more slowly.
The upper Map node calls Superformula XYZ once for each angle, and then the Reference Point node and ConnectPoints nodes generate the loop of points and lines. ConnectPoints is a user node that ships with Dynamo.
Superformula Loop uses two helper nodes: 2pi/n, which gives the angle that is 1/nth of a circle:
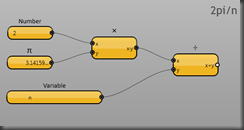
Dynamo measures angles in radians, and there are 2π radians in a circle (don’t be put off by the radians: They’re just a different way of measuring angles, like degrees but more convenient for some maths).
…And ‘Build Sequence 0 to n’, which builds an integer sequence from 0 to n:
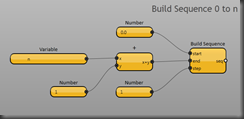
The standard Build Sequence node excludes the end value, and if I used this to generate my loop, it would leave a gap. I need to generate a complete sequence of angles from 0 up to and including 2π. Hence the custom node.
Superformula Loop Driver 2
This calculates the z-value and scale for an individual loop:
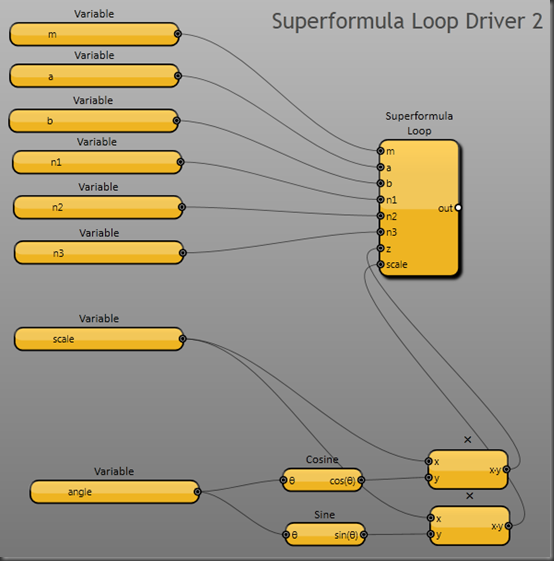
So I wanted the pumpkin to be roughly spherical, which meant that I needed to generate a series of circularish/pumpkin-shaped loops positioned and scaled like lines of latitude on the earth. So I’m using polar coordinates in a vertical plane to generate the z and scale values for Superformula Loop.
Why didn’t I just include this calculation inside Superformula Loop? Three reasons (similar to the reasons for helper nodes):
- Each node just does one thing: You can test and debug it in isolation
- Each node is simpler, and easier to understand
- I might want to re-use either the Loop node or the Driver node (tweaked) in other solutions.
Why is it called Superformula Loop Driver 2? Because Superformula Loop Driver 1 didn’t work.
Punkinator
This is the main layout:
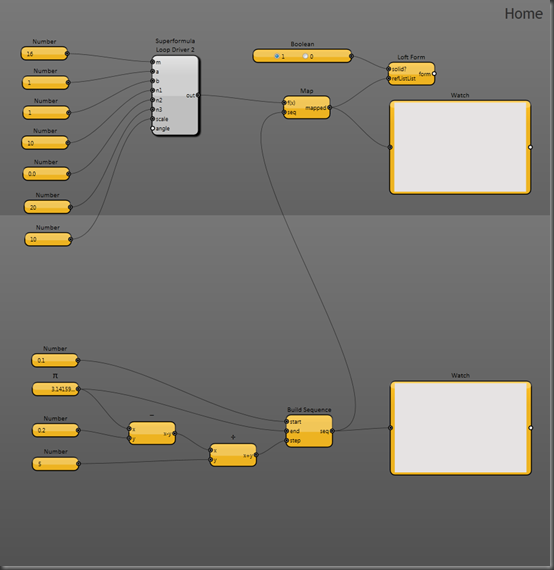
The bottom part of the layout generates a sequence of angles (in the vertical plane) to position the loops vertically. Half a circle (180 degrees) is π radians, so I space the top and bottom loops 0.1 radians off vertical, and then divide the remaining vertical angle by the bottom-left Number input to generate the loops.
The top part of the layout has the parameter input nodes for the superformula (which is driven by the Map), and then over on the right-hand side, there is the Loft Form node, which actually creates the form. the two Watch nodes are just debugging aids, so I can see the list of loops in the top Watch, and the list of angles in the bottom one.
Whew! That’s all there is to it.
Just a couple of caveats: The code runs slowly. If you want to try it out, I’d start by putting a small number like 4 or 8 into the bottom-left number node in Superformula Loop because that will make it complete faster. I’d restart Dynamo if you want to change this number again, because it will probably break the loft if you change it on the fly. The code only runs with the debug switch on. As Zach found, it only runs in Revit, not in Vasari (not sure why not just yet). If you try it, thank you, and do let me know how you get on!
And here’s the source.
